How to Setup and Manage the Approval Process for Absences that Require Approval
Some absences may require approval, while others may not - depending on the type or category of the absence. With Helios you can determine what type of absences require approval, how the approval process and routing work, and whether or not subs should be notified prior to approval.
Absences and Subs Dashboard
1. From the Absences and Subs menu, once drilling down into a specific day, there is a Review button for all absences that require approval.
Absences that require approval are dictated in the Time Absence Reason within Dropdown Edits and covered lower in this guide.
*Note that some absences may require approval before subs can fill the assignment in which case the sub button is not visible until the absence is approved.

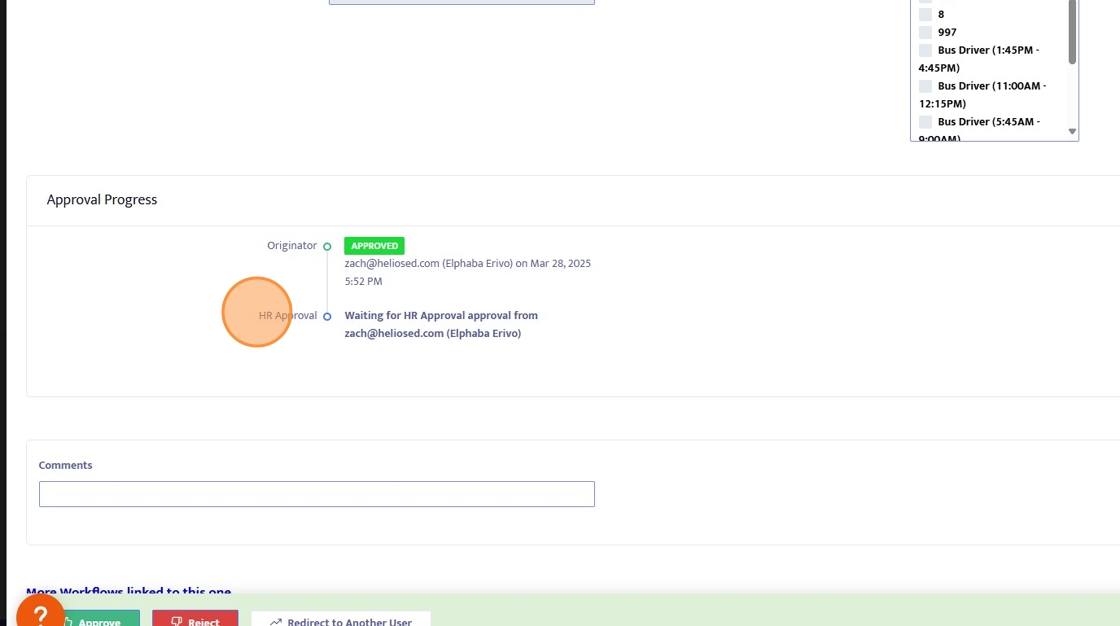
2. By clicking on the review button, you open up the absence workflow to approve, reject or redirect. Edits are not made here, but can be made by clicking on the edit button to the left.
Only certain users will be authorized to approve absences, this is setup in the Workflow designer which is covered later in this guide.

3. Here you can Approve, Reject, or Redirect the Absence Workflow. For more information on Workflow Approvals click here.

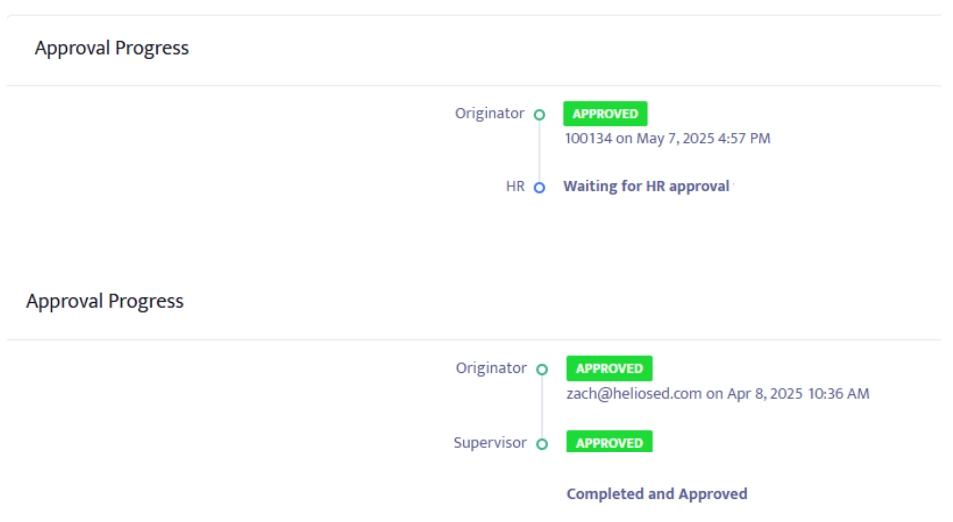
4. At the bottom, view the Approval Progress.
Workflow Designer
5. From the Workflow Designer (only visible to District Adins), create a new Workflow and select Absence from the Module Dropdown. Set Employee has access to yes - the other settings do not have to be modified as this is a specific Workflow that does not take the other settings into account.
Next, click Design Workflow

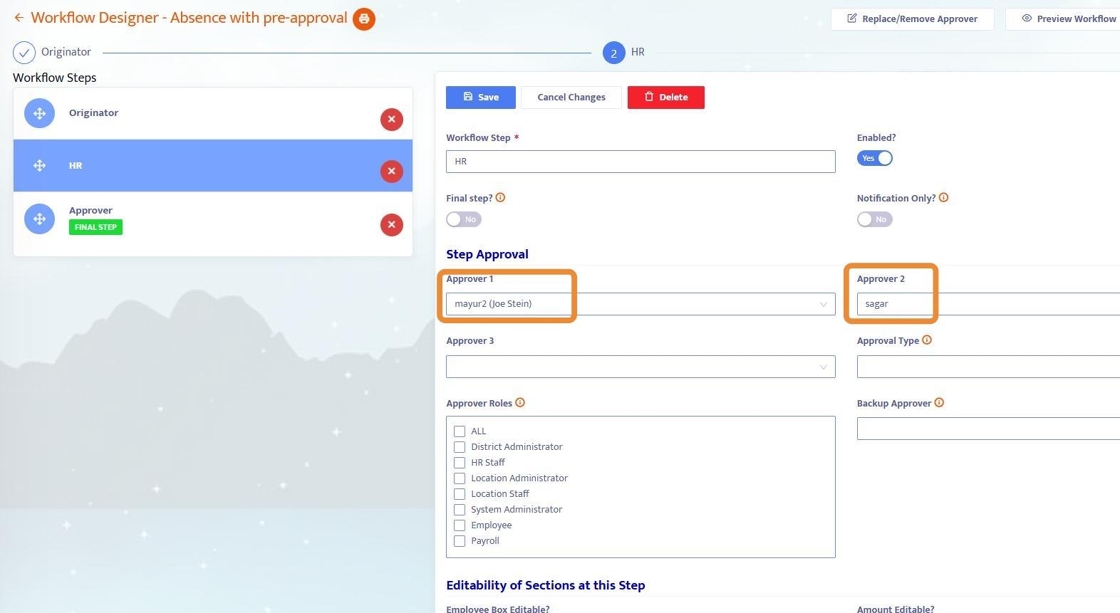
6. When designing a Workflow, start with the Originator step (whoever kicks off the workflow, in this case it could be the employee or an admin) which does not require any approvers.
For each step after the originator, assign 1-3 approvers. The absence workflow will then go to each step along the way until it reaches the final step at which point it will be fully approved.
Dropdown Edits - Time Absence Reasons
7. From the Admin Menu (only visible to District Admins) click into Drop Down Edits, search for Time Absence Reasons, and click into it.

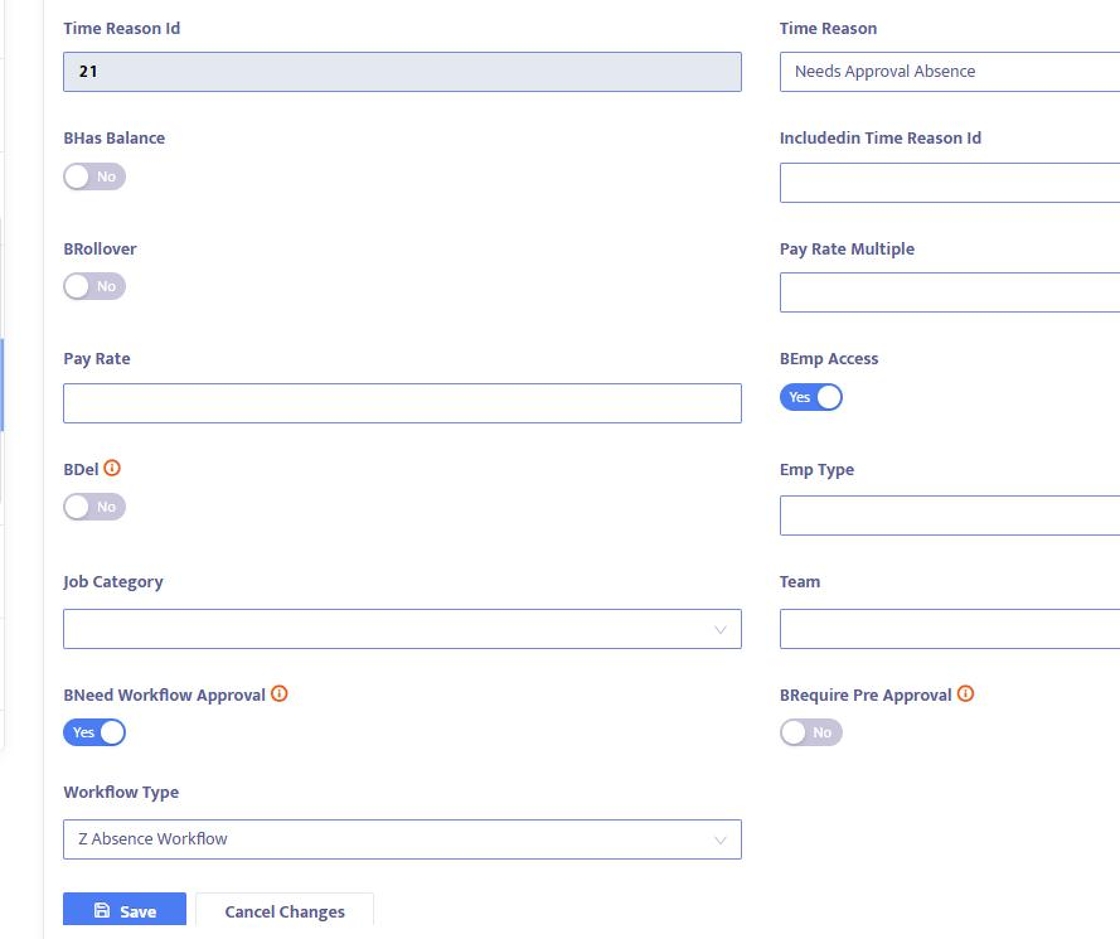
8. Within Time Absence Reasons, you can add a new reason or edit an existing reason. These are the options when selecting a reason for a given absence - reasons are required for all absences.
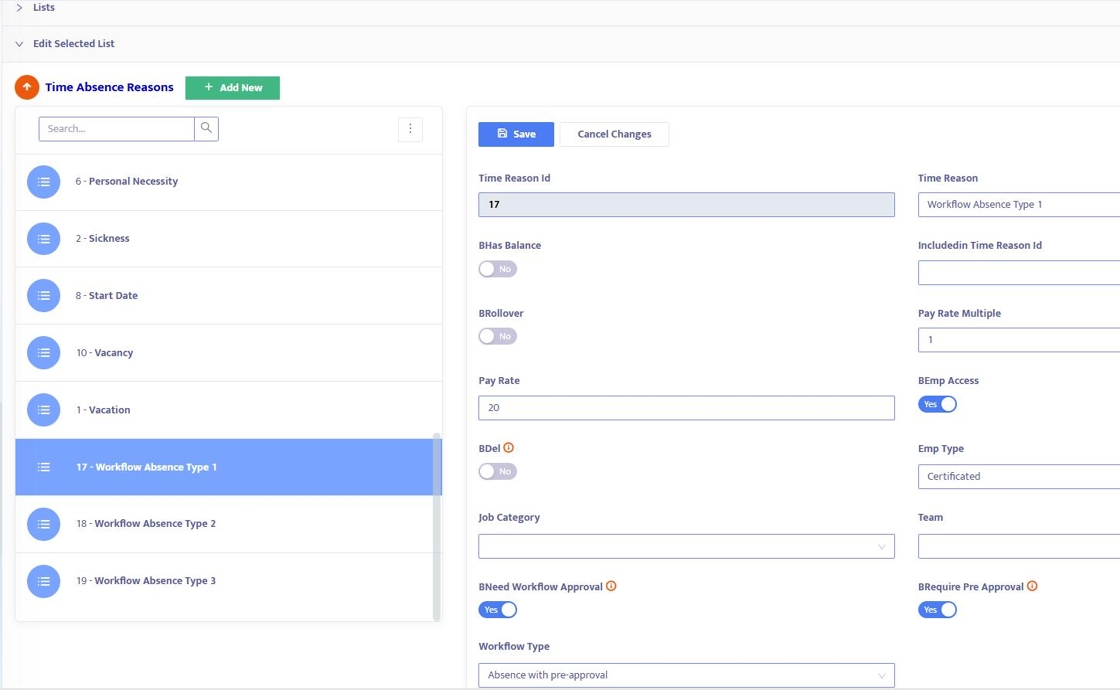
9. Each Time Absence Reason has a menu associated with it - most of the fields are optional and reasons can be tied to specific Employee Type, Job Category, or Team.
- Set BEmp Access to Yes if you want employees to be able to use this reason when entering their own absence, otherwise it is only visible to admin.
- Set BNeed Workflow Approval to Yes if this reason requires approval
- Set BRequire Pre Approval to Yes only if that absence should be blocked from the sub pool until after it is approved.
- Set the Workflow Type - this is a pre-established Workflow and is covered later in this guide.
Workflows Dashboard
10. From the Workflows Dashboard, sort by Workflow Type to see all Absence Workflows. From here, see the status is for a given Workflow, Current Step, and what Employee it's for. Authorized Users that have the User Access permission can click the Review button to approve/reject workflows from here - or approvals can be done exclusively from the Absences and Substittutes menu.

Employee View
11. Employees add their absence via the Employee Portal (or App). If the Reason is one that requires approval, identified in Time Absence Reasons, and has a Workflow setup for it, then it will trigger the Workflow.
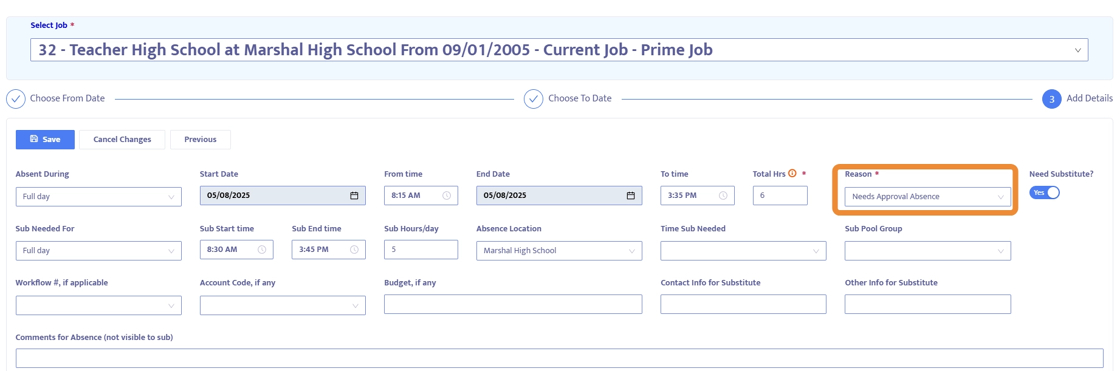
12. After the Absence is entered, the employee can view the Workflow associated with that Absence.

13. Once Approved, the Employee gets an email confirmation and can also see in the Approval Progress section.