How to Send a Group eSign Form or eSign Document to a group of employees (like a Letter of Reasonable Assurance or Employee Handbook)
A form has fields that may change based on the recipient (like name, job title, other criteria, etc.) and requires the recipient to fill in fields on the form - even if just adding a digital signature - where a document is standard text, like a pdf, that will look the same to all recipients and has the option to eSign only.
Create the Form
1. First, ensure that the form in which you'd like employees to fill out is uploaded into Helios via the "Form Designer."

2. Existing forms are located on the left, and can be edited by clicking Design Form, or you can "Add New" to create a new form.

3. - For any given form, label the "Form Type" and Form Name (these can be the same)
- Enable the form if you want it active (disable to turn it off)
- "Employee has access?" can stay at No - they will still be able to complete the form as it's emailed to them.
- Add an optional description

4. "Save" all changes which will then allow you to begin designing the form.

5. Click "Design Form"

6. "Click to Attach" allows you to upload a PDF version of a form, or you can create one from scratch by using the "Add Field" buttons.

7. It's generally easier to upload a document, after doing so, click "Yes" so that Helios will begin to map the form fields and match them with electronic fields.

8. You can tweak any of the suggested field elements so that they align with the original document, being sure to add any additional information or context.

9. Click "Preview Form"

10. The preview shows what it will look like to the employee.

11. Click "Save"

Send out the form to a list / query
12. Click "Communications"

13. Click "Send Group eSign"

14. Click "Send eSign Forms"

15. Select the Form, that you've already created, from the dropdown

16. Add a Name/Title to this group eSign

17. - "Completed and Signed" keep set to No (unless you are sending out a signed document that is just for employee records.
- "Need Employee Sign?" set to Yes.
Add the Query / List of Employees who will be notified to complete this this form. Previously created Queries will show in this dropdown list,for detailed instructions on How to Create a Query in the Report Designer, please click here.

18. You can also preview the list here.

19. Here is an example of the preview

20. Add any optional notes

21. Click Save to send out the document to all people listed in the Query.
Note: This is the final step before the form is sent out to all employees on the query.

22. A "Successfully Saved" message confirms that the form is being added to all employees in the query

Send out the Document to a list / query
23. Similar to the Group eSign Forms, Group eSign Documents are found in the Communications menu. In this case, you design the document outside of Helios and save it as a PDF which you can then upload here.
- Categorize the Document and Name It.
- If an employee signature / acknowledgment is required be sure to toggle "Needs Employee Sign?" AND "Employee Access?"
- Upload the file
- Specify the Query to use.
- Fill in any optional details like Tags, Document Number, and Description.
- Hit Save - Note that "Save" is the final step in the process and will immediately begin sending emails to all employees on the query once saved.

What it looks like for employees
24. Employees are notified, via email, that they have a new form to complete or document to sign.

25. When they click on the link in the email, it will take them directly to the eSign Documents section of the Employee Portal. This is true whether a Form or a Document.

26. Clicking into the form / document, depending on how it was setup, the form will display with fields filled in based on the employee's information or ask the employee to complete the empty fields.
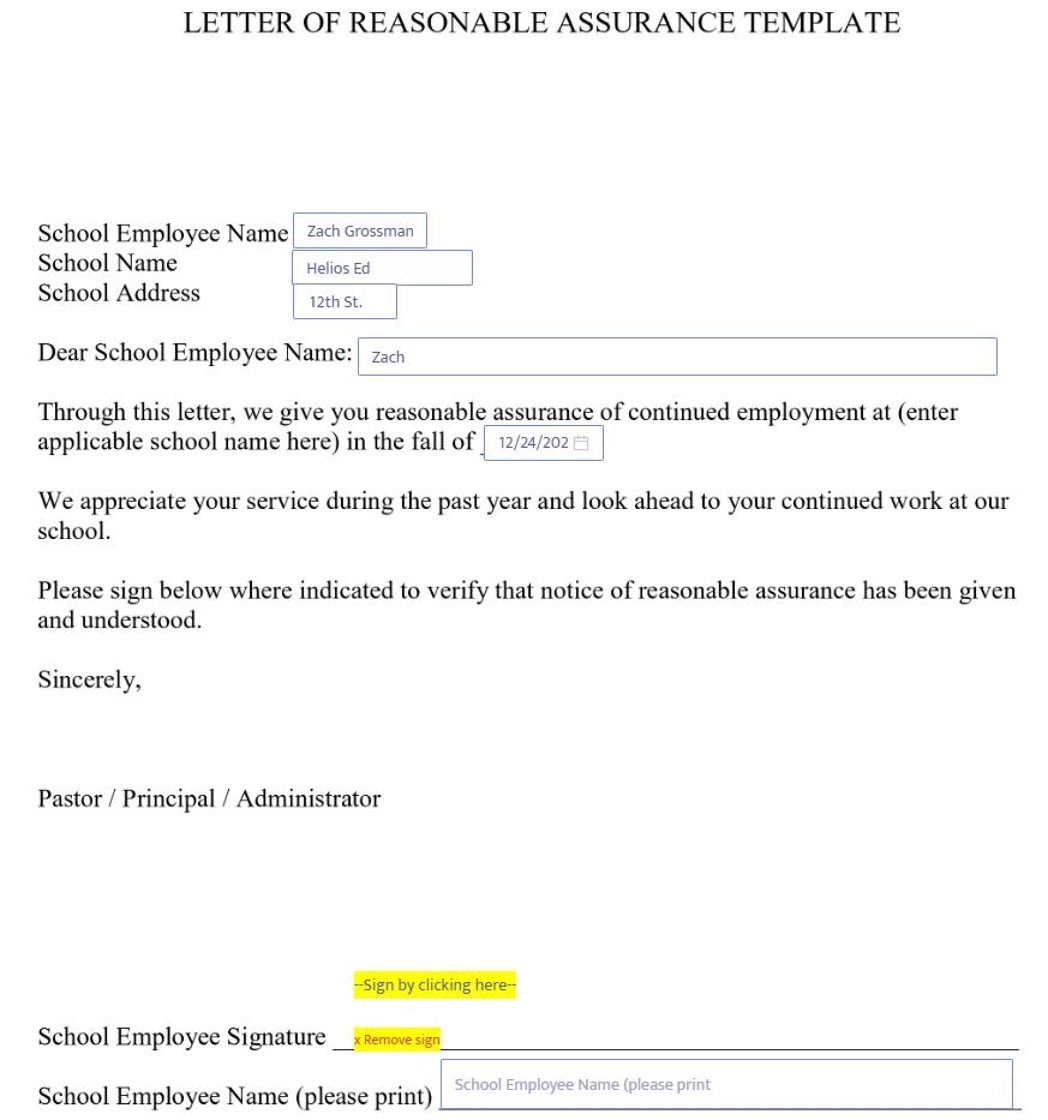
27. Employees can complete all required fields on the form and once finished, they must click the "Save and Sign" button at the bottom of the document to complete the form / document and mark it as done.

Tracking form submissions (and non-submissions)
28. Use the Report Designer to create a report showing all employees who were sent the form. Include column headers like:
- Name
- Form Title / Document Title
- Is Form Complete / Is Document Signed
- Form Completed Date / Document Signed Date
- And any other information from the form that you'd like to track from a Form Submission
- "Did they answer yes" / "Did they answer no" / etc.
- Filter the listto only include the information that you want to see in this specific query
- You can filter based on things like Job Class, Certificated vs Classified, Location, Status
- Filter by specific form actions - did they sign a particular form or not?

29. Use this query to follow up with anyone that either signed, or did not sign the document. If you need to send a reminder to those that have not signed you can find this saved query in the Run Reports menu under User Defined Queries where you can duplicate them, further filter, and continue to access without needing to make a brand new query.

30. All completed Forms / Documents are also stored directly in the employee's E-File and completion dates along with digital signatures are viewable from there.
