How to Add Users and Customize User Access in Helios
User Access enables or restricts what areas of Helios a User can access. There are default User Roles, with pre-defined access levels, but there is also plenty of room to customize User Access to meet the needs of your organization. Custom User Access roles can also be copied to other users.
1. To get started, click "User Access" from the Admin Menu. Only Users with the District Admin role can access the User Access menu.
The District Admin role grants all levels of permissions to the user, including Admin capability to administer the system, change settings, and add new users or change existing user access - including all menus under Admin and Payroll in the screenshot below.

Add New User
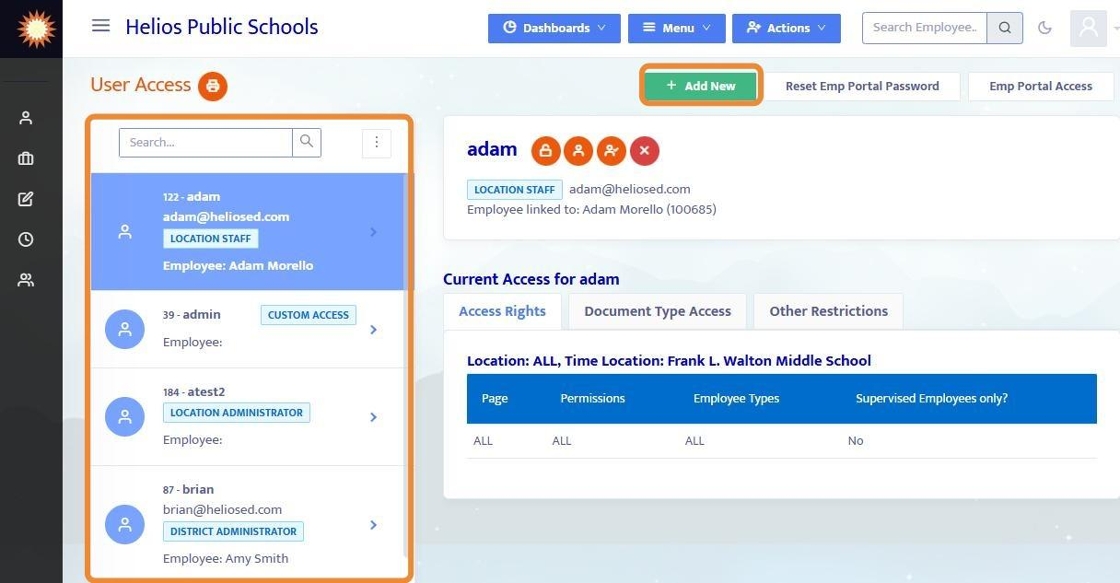
2. From the User Access Menu, you can view all existing Users along with their pre-defined roles, and you can + Add New Users.
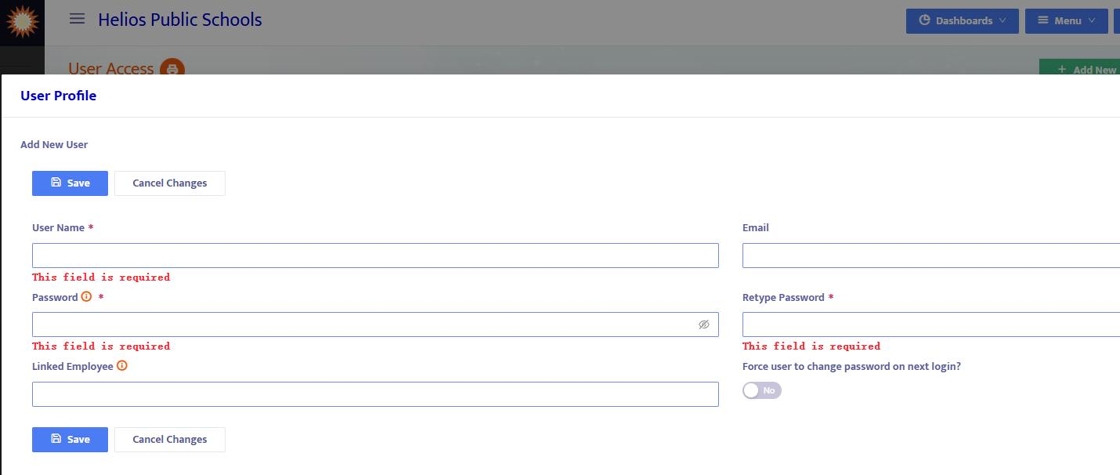
3. When adding a new User, enter the User Name and Email (we recommend making them the same, especially if using SSO)
- Create a temporary password (if using Single Sign On, the User will not need to use this password to login).
- toggle the 'Force user to change password on next login?' to have the User create a new password when they log in.
- Linked Employee
- Admin Users should be linked to their own Employee Profile, that is done here.
- If not set here, you can go back and 'Edit User Profile' in the future to link to their employee profile.
- Admin Users should be linked to their own Employee Profile, that is done here.
Note: The system does not email the new user with login credentials - send each new user an email with their User Name and Temporary password - OR, if using Single Sign On, instructions on how to login with SSO.
4. After creating a new User, and saving the User Name / Password, assign the user a role - this role can also be edited at a later time.
There are 6 pre-defined roles, each with unique access levels based on a generic district - each can be customized, in the Customize Access tab, to meet the needs of your district. Here is a summary of each role:
- District Admin: All levels of permissions to the user including Admin capability to administer the system, change settings as well as add new users or change existing user access
- HR Staff: Ability to manage all employee data, and run reports, but does not include the Admin capability to administer the system
- Payroll Staff: Grants ability to manage all employee data, process payroll, and run reports, but does not include the Admin capability to administer the system
- Location Administrator: Limited to certain location(s)- Read-only access to active employees of the selected locations only. However, user can add, update, or delete records on the Evaluations page. The user cannot view the SSN field on the Profile and Employee Details pages. This role is best suited for principals and deans.
- Select the site location(s) they will have access to.
- Location Staff: Limited to certain location(s) - Read-only access to active employees of the selected locations only. However, user can add, update, or delete records in Time Reporting and Workflows modules. The user cannot view the SSN field on the Profile and Employee Details pages. This role is best suited for staff at school sites who will report time and submit workflows
- Select the site location(s) they will have access to.
- No Role: Clears all pre-defined roles from the user - but can still be given custom access levels.
At the bottom of this menu you can also copy access from another user whose access was already customized.

Edit & Customize User Access
5. To edit an existing User's Access, first select the User from the left-hand menu and then click the Edit User Access button

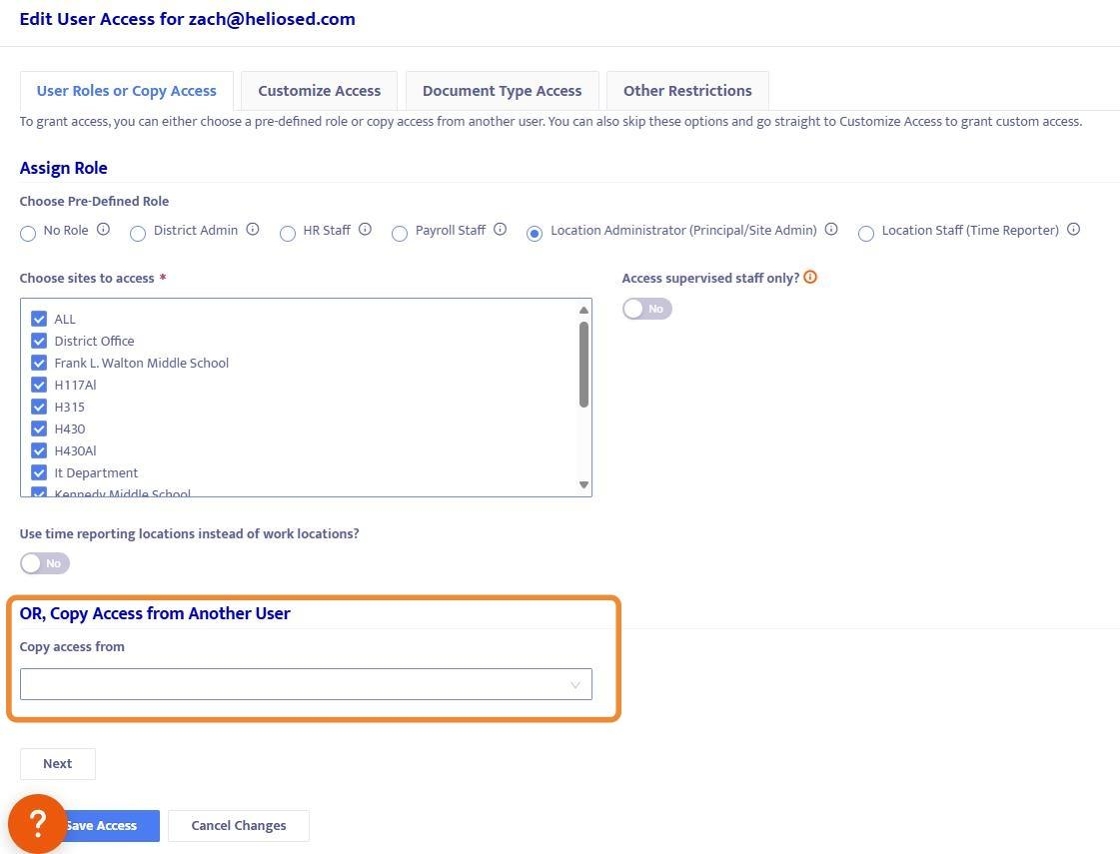
6. To change a User from one Pre-Defined Role to another, use the Assign Role radio buttons.
Note: Location Administrator and Location Staff Roles can be limited to certain Sites/Locations - they also have the ability to "Access supervised staff only" which would only show them employees who they are listed as supervisors for as identified in Employee Details.

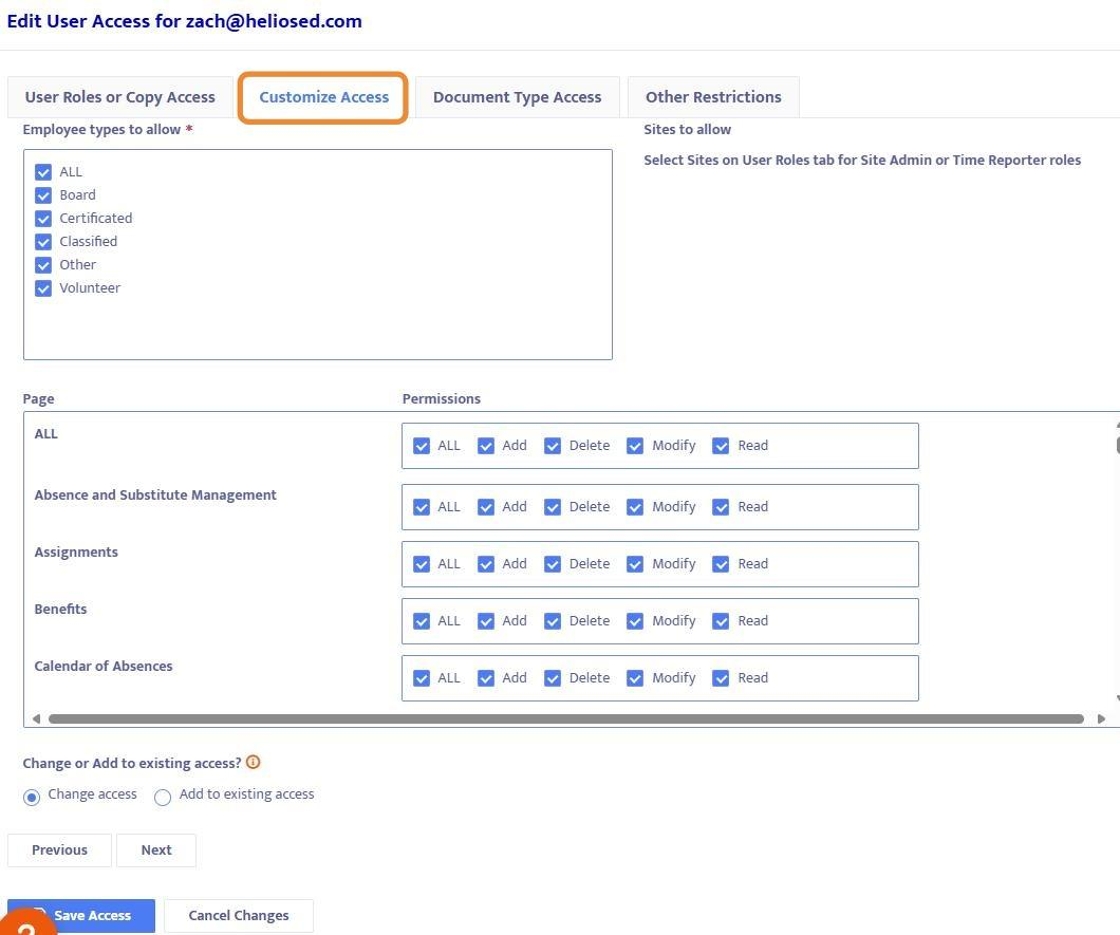
7. In the Customize Access tab:
- Set Employee Types to allow (Certificated, Classified, Board, Volunteer, Other or All).
- Set the Permissions to certain pages within Helios. There are many pages and dashboards that can be customized, like Absences and Substitutes, Workflows, Employee Profile, Evaluations, Onboarding, etc.
- Each Page has options for Add, Delete, Modify, or Read
- use Ctrl+F (find) to search for page titles on this screen because some modules have several pages associated with them - for instance "Evaluations"
8. Common Scenarios for Page Permissions:
Note that Permisions can also be restricted by Employee Type, Site Location, Access to Supervised Staff Only, Document type, and/or Job Category/ Job Class.
- Evaluations - A User needs to administer evaluations: they should have Add, Modify, and Read Permissions to all Evaluation pages (Evaluation Form Details, Evaluation Wizard, Evaluations (Left Menu), Evaluations Dashboard.
- E-Files and E-Documents - A User needs to see employee files and documents: they should have Read Permissions on the E-File Documents and E-File Forms pages and Add/Modify Permissions if they need to add documents to employee E-files.
- Workflows - A user needs to start/approve workflows: they should have Add/Read/Modify Permissions on Workflow Details and Workflow pages.
- Absences and Substitutes - A user needs to administer absences and substitutes: the Absence and Substitute Management page should be set to add, modify, read.
- Time Sheets - A user needs to manage time sheets: Time Reporting, Time Reporting Combined, Time Reporting Combined Entry, Time Sheet Details should be set to Permission of Add, Read, Modify. And Time Sheet Review page if applicable.
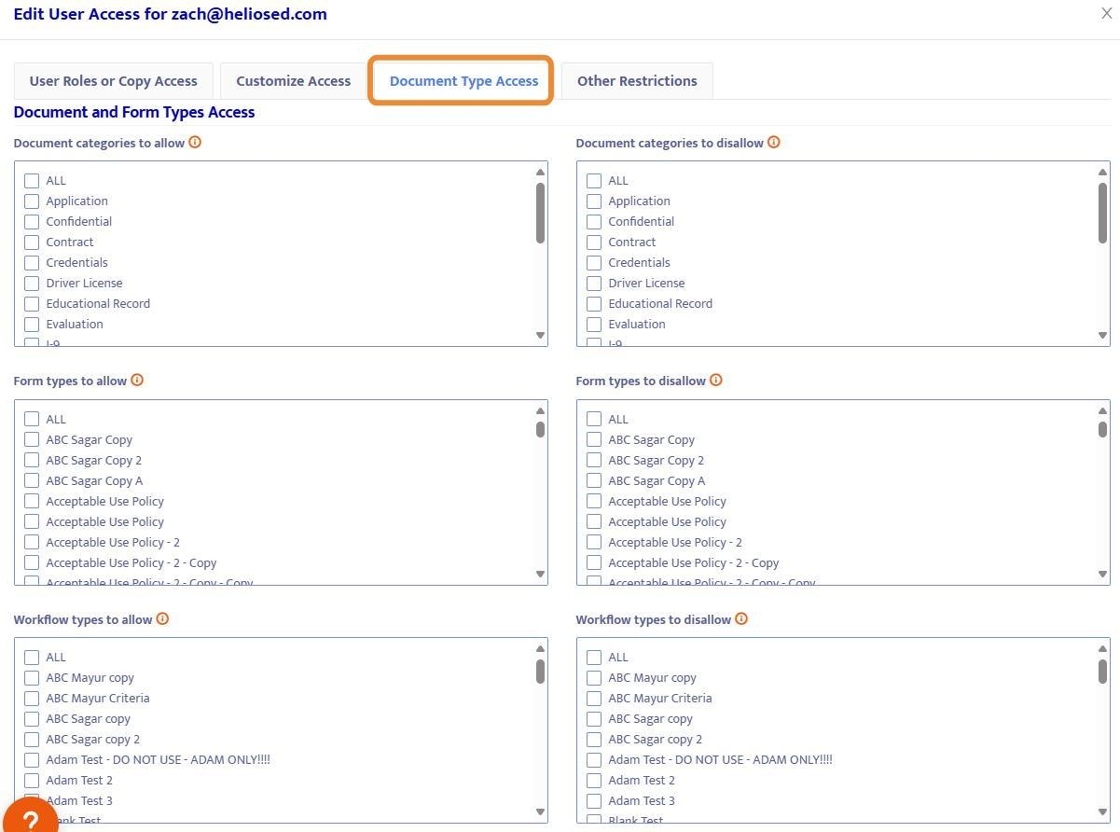
9. In the Document Type Access, you can Allow or Disallow access to different categories.
Note: Only use either the Allow (left side) or Disallow (right side) to restrict access but do not use both as this will cause issues. When adding new categories to any of the document types be sure to check the access level. If you want a User to have access to everything, it's best to not click anything.
- Document Categories pull from the Dropdown Edits e.Document Categories
- Form types pull from the Form Designer forms
- Workflow Types pull from the Workflow Designer - note that Workflows do generally have forms within them so ensure that access to form is in line with access to Workflow.
10. Other Restrictions include Job Categories, Job Classes, and Team.

Testing User Access
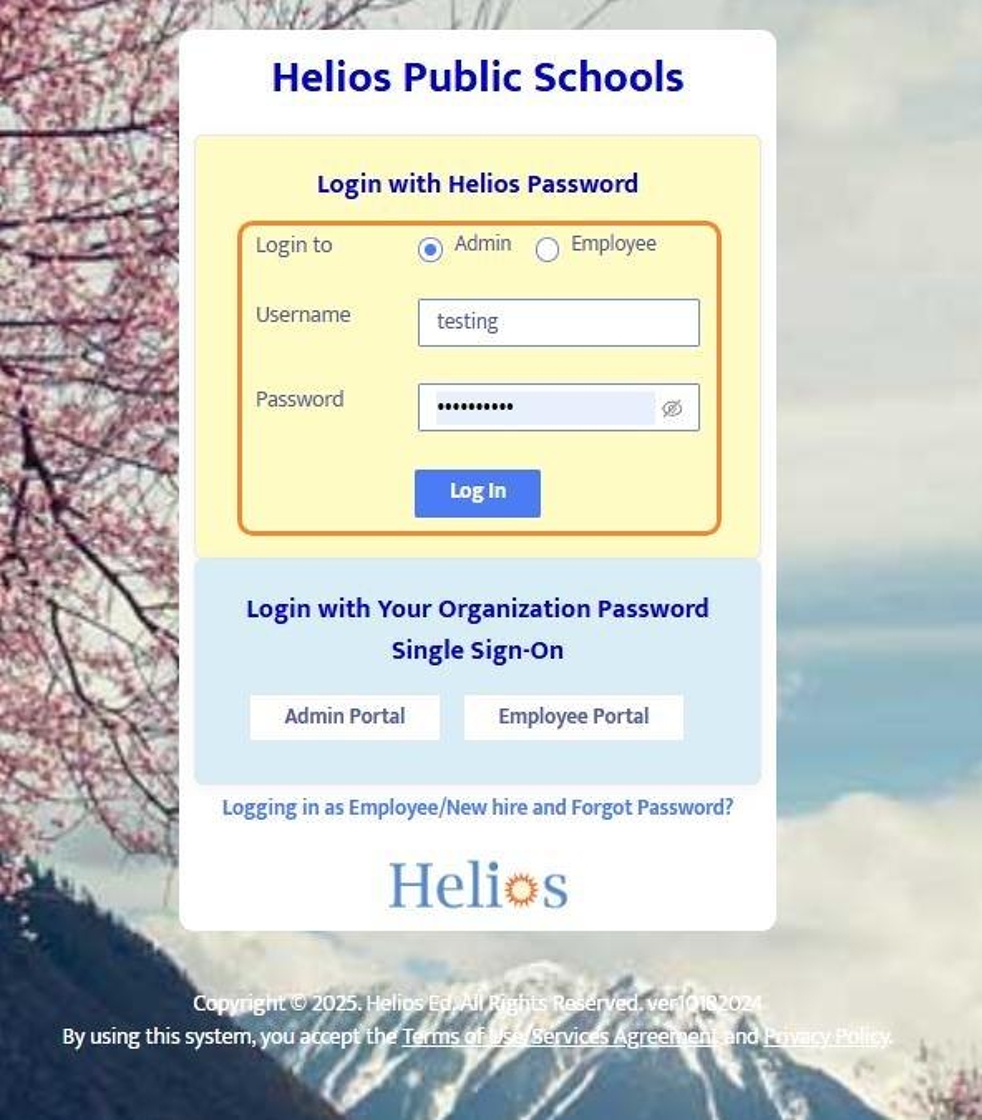
11. Creating a generic Test user to explore different User Access scenarios is a great idea - District Admin can create a generic user, customize access, and then login as that generic user to see if that access meets their needs.
In the screenshot below, the User Name is "Testing" and District Admin can create a similar account, create/reset the password to something they will use to login and test with.

12. Login with the test account and ensure that the permissions for that account satisfy the requirements for what you expect the user to do within Helios.
Copy Access from Another User
13. Once the User Access has been customized and tested, you can Save Access and then Copy this User Profile to other User's who you'd like to have the same exact access. To do this, open the Edit User Access screen and in the "Copy access from" section, type in the name of the user you'd like to copy access from and then save.
You can copy access over from any of the test accounts that you've created, or any Users within the system.