Workflows Dashboard Overview
1. Click "Workflows" from the Dashboards menu

2. Here you can see all of the workflows that are in your inbox, and sort by different fields like All, Approved, Archived, and you can filter by workflow type and also search.
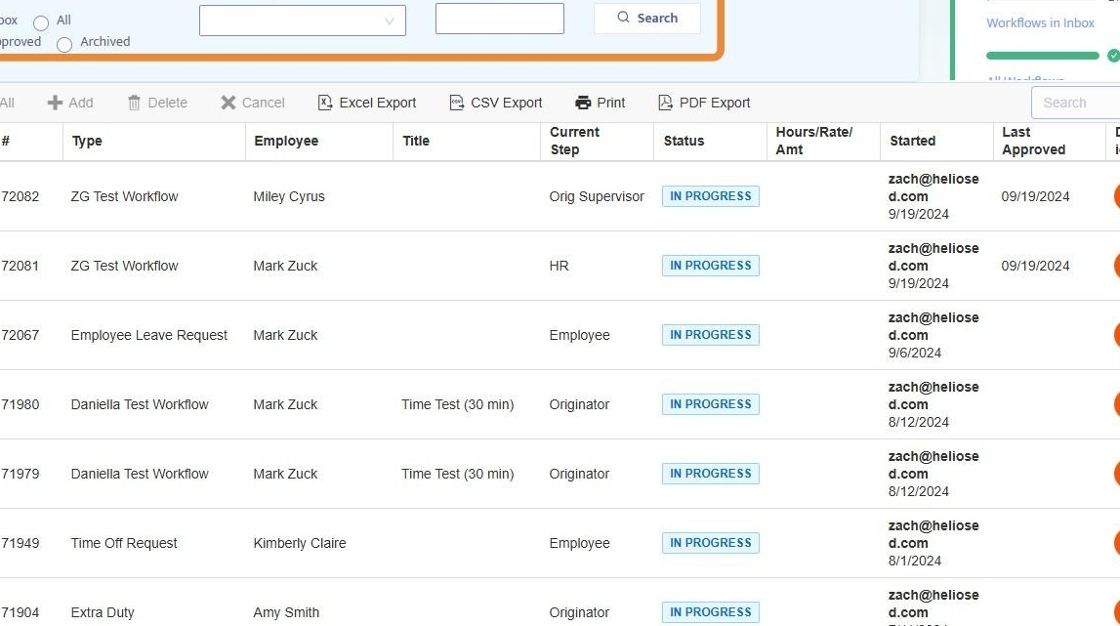
3. Clicking on the Review button opens up that workflow to see details and approve / reject the workflow

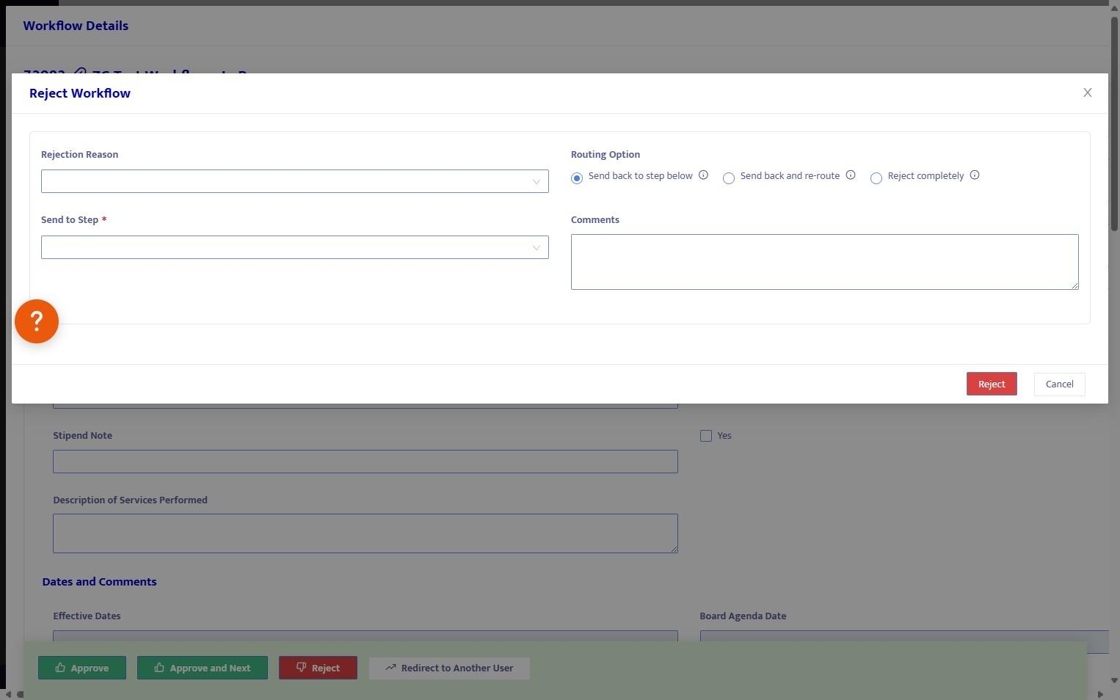
4. Within the workflow, at the bottom, there are buttons to approve, approve and next (which will open the very next workflow on the list after approval), reject (you can put a reason for rejection, or redirect to another user.

5. If you click "Reject" a new menu appears with fields for rejection reason, routing options, send to another step, and add comments.
6. To add a new workflow that's already been designed as a template, click "Add New"

7. Select the workflow type from the dropdown. If you don't see the workflow you are looking for, check the Workflow Designer and make sure that the workflow is enabled.

8. Click "Start"

9. That will open the workflow so that you can input all required fields.
Note: workflows that are accessible to employees can be initiated from the employee portal, or from a link that you send. Any workflows associated with an employee will be tied to that employee in their e-file.
